Friday, December 16, 2016

First Semester Video Production Final

Feature Stories


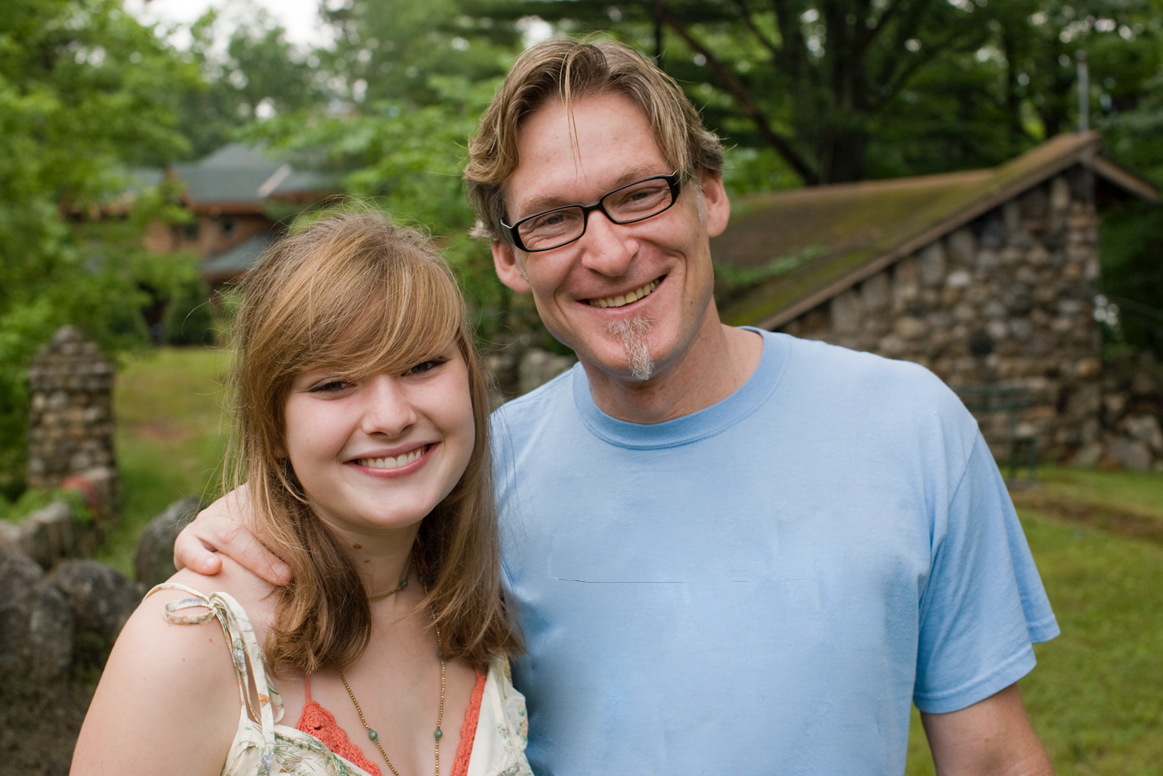
This semester in Video production I was given the opportunity to create three feature stories. With each one I learned more tricks on how to make it even better than the last. My first story was was about sophomore golfer Abby Rist and why she became a golfer and how much her dad has influenced her. This project took two days to plan and write the interview questions, one day to film, and two days to edit. Some challenges I faced were not using a tripod and getting enough footage in just one day. It turns out that i had more then enough footage and the shakiness of my camera was solved because now I use a tripod. I learned interesting shots I could do to make golf look interesting on video. Some of my favorite shots are when I get really low with the camera angle and the shot of her dad hitting the ball from the golf cart. I got great feedback on this project and it was mostly good. One thing my classmates mentioned was that some shots were shaky but I fixed that in my next videos. Overall I am very happy with this video and it won to be on ONW now out of all the sophomore videos so I am very proud of that.

One in 2000 Interview


This project was called One in 2000. I chose to interview Emily Mauk and talked about her summer memories. It took about as long as the feature story mentioned above took. Some challenges I faced were tying to get creative shots and incorporate the six shot system with just an interview. Since I had no footage of what she did over the summer I had to make it an appealing video with just shots of her sitting down. I used all the shots from the six shot system and spread them out evenly to make it appealing. I learned a lot about the actual camera with this project since I hadn't used it very much beforehand. I got the feedback that it was too long so I went back and took out any unnecessary footage and brought it down from 1:56 to 1:47. Overall I don't think this is one of my best edited videos but I am happy with it because now I am more skilled than I was during the making of this video. 

Time Management
In class I try to maximize my time as much as possible because being in e-Comm in general has really improved my time management. I get all my videos done by the deadline because I actually do it in the time that Mrs. Smith gives us. If, for some reason, I get finished editing early, I immediately try to find a way to try and improve my video in some way before I turn it in. Or I just experiment with Premier Pro since I am still kind of new to it. Then I double check everything so that there are no mistakes or jump cuts and once I am sure I've done all I can do for the video and it is the best I can make it, thats when I turn it in. Sometimes, if I feel like I need more time to edit my video to the best it can be I stay after school to work on it. I don't just rush and turn it in during class, I come back after school or before school with a fresh mind and work on it until I am fully satisfied with it. 

Strengths and Weaknesses
Some areas of my strengths are time management. As I mentioned before, e-Comm has really helped improve my time management not only for video production and editing but for all of my classes. Another thing I am good at is editing fast. I know the basics of Premier Pro and that helps me edit. I can edit a whole video in less than one day which helps me with time management as well. One thing that I can improve on is my knowledge of the different accessories that Premier Pro has to offer. I am just not that comfortable with it but I know that by summer I will be because I will have gotten so much more practice with editing and I will have gotten to know it better. Another thing that I need to prove on is filming entertainment videos. This will get better next semester since all we've focused on this semester is convergence, which I prefer. 

Overview
The thing I loved the most about this semester is making convergence videos. I am very much interested in the convergence journalism side to video production so I am very glad that we spent so much time on feature stories. I would add more time to film in the future because if the thing that I want to film only meets once a week than I can fall behind if I don't get enough time for the project and then it won't be my best work. One overall take away from this semester is my knowledge of the camera and tripod. One goal for next semester is to become more comfortable with the entertainment branch. 

First Semester Graphic Design Final

Photoshop Tutorials
The first project that we did in Exploring Graphic Design was a bunch of Photoshop tutorials. In these tutorials I learned the fundamentals of Adobe Photoshop. My favorite tutorial out of all of them was the challenge man which is shown on the left. All I was given was the before picture, pictures of nature, and my creativity. I was given no set and stone directions and I was supposed to use all the skills of photoshop that I had been learning to morph this man into nature. Throughout all of these photoshop tutorials, I learned everything about technical skills. Each project taught me something different and made me work to get the finished project. I learned project management as well like how to finish a project in the time given. This project took about two to three days. Some challenges I faced was trying to finish all of the projects in the time given and the make sure I followed the tutorials step by step. I was given good feedback and old that my final products were very well made. I didn't have time to change anything based on the feedback. Overall I think my products turned out very well and even the ones where I struggled more on I still think turned out well made. 

Raccoon on Illustrator
The next project that we completed was a Raccoon holiday postcard. This project took about two to three weeks. This is where we finally started to dive into the world of graphic design and let our creativity flourish. We had a tutorial for the actual raccoon but everything after that was all you. I picked the holiday and the type face is my own, and the accessories I picked as well. Some challenges I faced were the presents. They were really are for me to make because when I made them I made them really small and they looked great but them when I enlarged them they got distorted and the red line on the front got bigger so they were not my best work but I made it work. Along the way I learned how to upload a project on Behance, how to submit my own typeface onto a project on Adobe Illustrator, how to make 3D objects, and how to make bows on presents. Some feedback I got was my scarf was really well made and I could maybe arrange my presets a little nicer. I took these criticisms to heart but sadly didn't have enough time to alter my work. I think my final product looks clean and festive, but I could've worked harder to make it look neater. 

Broadway Infographic
Our next project was an Infographic on Adobe Illustrator over any topic of our choosing. I chose Broadway By The Numbers because I love broadway and New York City so I wanted it to be about something I really loved and not something random. I mentioned five topics on the infographic and used the curtains and the lights to draw your eyes down are you read. This project took about one to two weeks to fully complete. Some challenged I faced was spacing. I didn't want it to be all clumped together and I wanted just the right amount of white space so it still looks full. Along the way I learned many skills like how to better use gradients as you see in my lights and curtains. I learned how to make a skyline out of lines. The feedback I received was overall very positive, many people liked my infographic and enjoyed its format and how appealing it is for the eyes. One thing i did change to make it more appealing was I changed the color of the word 'female' so it matched the color of the females in the chart. Overall I am very happy with how my infographic turned out and am happy that everyone liked it as much as they did. 

Time Management
In class I try to maximize my time as much as possible because being in e-Comm in general has really improved my time management. I get all my work done by the deadline because I actually do it in the time that Mrs. Smith gives us. If, for some reason, I get finished early, I immediately try to find a way to try and improve my project in some way before I turn it in. I double check everything so that there are no mistakes and once I am sure I've done all I can do for the project and it is the best I can make it, thats when I turn it in. Sometimes, if I feel like I need more time to get my project to the best it can be I stay after school to work on it. I don't just rush and turn it in during class, I come back after school or before school with a fresh mind and work on it until its to my liking. 

Strengths and Weaknesses
Some areas of my strengths are time management. As I mentioned before, e-Comm has really helped improve my time management not only for graphic design but for all of my classes. Another strength of mine are my technical skills. I can follow a tutorial with little to no help. I understand the editing softwares and help many classmates if they get stuck. One area that I can improve on is my creativity. I love following step by step tutorials but have a hard time making it my own. I struggle when I am given a project with no instructions and have a hard time. I know that my next semester I will improve on this more, I just need more practice. and more projects that allow me to be free in my editing. 

Overview
What I loved most about this semester was the final project about Armin Hofmann because I felt like I really got to know him and his style and I actually felt really good about making projects without a tutorial. There isn't anything that I would really want to change about this semester in graphic design, I had a very positive experience in this class. One overall take-away form this semester is don't second guess yourself. If you like your work but someone else thinks you should change something that you don't really want to change, don't change it. Go with your gut. One goal I want to set for next semester is to organize my Behance and keep adding my projects on it and make it look very professional. 

Monday, December 5, 2016

Feature Story #2 Blog


My second feature story was about Olathe Northwest's Choir. I wanted to just show how the choir is so successful and how hard the teachers work for its success. In my narrative lead I said that choir is one of the most popular elective at ONW and how hard Mrs. Williamson and Mrs. Cohick work for it. I interviewed Mrs. Williamson, the choir teacher, and Sophie Kebret, who is a sophomore choir student. Mrs. Williamson talked about how everyone who has an interest in singing should join choir and how it is a very inclusive environment. She also talked about the accompanist, Mrs. Cohick. She said that Mrs. Cohick is a great asset to the choir department and how none of the success it has could be possible if it weren't for her.
When i was shooting this video at the beginning i had a hard time trying to find a variety of shots and not just shots of the choir singing. So I incorporated shots of the posters around the choir room and I also incorporated the six shot system. When I edited it I have gotten a lot more comfortable with Premier Pro and the editing time took barely any time.
Some feedback I received was that some of my shots are shaky so I tried to edit them and I ended up changing the beginning to remove some of the shaky shots and it ended up losing a to better.
Overall I think this project well reflected my skills in convergence journalism.

Infographic Blog


This is my Broadway Infographic that I made in my Sophomore Exploring Graphic Design class. I chose a topic that really speaks to me because I one day would like to be on Broadway. I have loved Broadway shows for a very long time so I wanted to make an Infographic called: Broadway By The Numbers. I researched 5 things for the Infographic: Most Popular Broadway Show in 2016, How many Theatre-Goers are Female, Longest Running Shows, Average Price of a Ticket, and Total Seats and Total Theatres. I created the curtains and made them thicker at the top and thinner as your eyes go down the Infographic to really draw your eyes down the project. I also used the lights to shine down on the bottom information. The process of actually creating this on illustrator was pretty easy because I knew exactly what I wanted it to look like in the end. I received a lot of feedback from my peers including: nice curtains, interesting header, good gradient on the spotlights. Overall i think this project was a success. 

Monday, November 14, 2016

What Makes A Good Feature Story?

In my sophomore video production class the teachers chose one video that they thought was the best made out of all the submissions and mine won. In my feature story I made sure to add in a variety of shots and really got creative with most of the shots I captured. I made sure to keep the six shot system active and present in the feature story. In a strong feature story you need to make sure to not repeat the same angles and clips and always remember to get tons of B-roll and keep the audio loud but not blaring. The concept itself needs to be good because it is the overall foundation of your video and you need to really know what you want to achieve from the final product of your video before you even start story boarding. The whole story needs to tie everything together by the use of strong voiceovers that capture the audiences attention when they watch. 

Monday, October 24, 2016

A Feature Story Experience Blog

My next project in Video Production class was a more convergence journalism side rather than entertainment, which I prefer. My concept was to take a sport that many people know about and find a player and really dive in to the aspects of the sport itself. I chose my friend Abby Rist who recently started playing and took me on a journey of why she started late and how she got into it. I made sure to keep my narrative leads and voiceovers very professional sounding and keep the whole video short and sweet. For my second source in the video I interviewed Abby's dad, Bruce Rist. He is a professional golfer and he's the main reason Abby started golfing. These interviewees really complimented each other because their father-daughter relationship gave the video a certain emotional touch especially when she mentioned that her dad coaches her to get better.
I had a very good experience while shooting and editing the video because it was my first real professional convergence piece that I've done. Towards the beginning of this process I wrote a script which acted as a loose blueprint for my project because it had the order of shots I wanted and what I wanted to cover in the voiceovers and interviews. It was a loose blueprint because I wanted to be able to alter it if needed, which I ended up doing in some parts. Shooting this video was especially fun because I think the sport golf itself has so many opportunities to be yourself in the shots that you can film. I wanted to maintain the six shot system but add my own twist on it incorporating new and interesting shots that catch the eye.After filming and editing my Golf Feature Story on Abby Rist, I moved on to the written portion of the project. I created a written 'roadmap' of my video that showed step by step what I wanted in each section of my video.

The first section was the narrative link. This is a short section that you use to caption the audiences attention. If your narrative link is weak then no one will want to keep reading/watching your project. My narrative link was about how student show favoritism to certain sports and the sports that they choose to play they dedicate they time and effort in it. Abby dedicates her time to golf and follows her father's lead and trusts him to coach her.
The next section was the nut graph. This is where I formally introduced the who, what, when, where, and why. Who- Abby Rist, sophomore golfer. What- Her journey through high school golf with her dad, who is a professional golfer, who coaches her. Where- Olathe northwest high school. When- Sophomore year. Why- Abby loves golf. Also in the nut graph I added 3 or 4 of Abby's quotes that she said in her interview with me. Next I added one of her fathers quotes as well. I explained both the quotes and explained how they were relevant.

Abby Rist feature story
Hearing the snap of the 52” wedge club against the ball and seeing it fly through the air fighting the wind to get to the green. That sigh of relief when it takes less than two hits to get it in. The cheers of the fans in the distance while you see the ball go in the hole. That’s all a day in the life of sophomore golfer Abby Rist.
Many students choose favorites when it comes to playing sports. No matter what the sport is, the players always devote their time into it. Rist devotes her time to golf.
She says she was introduced to golf through her dad who is a professional golfer. Even though her dad has played golf for over 20 years she just started playing golf this year.
“I didn’t start playing golf until this year because I didn’t really think it was a sport for me, but my dad pushed me into doing and and I have loved it,” Rist said.
She puts in hard work to make the golf team and wants to keep pursuing golf throughout her high school career. She believes practice leads to vast improvement.
“I like getting better and seeing how you progress over time,” she said.
Her dad, Bruce Rist, a professional golfer, is very supportive of her golf journey and is glad she decided to join the team. “It’s something we can do together,” he said. “Playing together is something we can enjoy together.”
Abby has enjoyed her time in golf so far and talks about whether it’s more mentally or physically challenging.
“I think it’s a little bit of both but definitely mentally because you have to push yourself and strive to get better,” she said.
Abby Rist and her family are glad she chose to take after her dad and play golf and hopes that she improves all throughout high school. She has high ambitions of herself and works hard to achieve her goals.


Overall I am very pleased with my video and am excited to dive deeper into the world of convergence journalism!

Friday, October 7, 2016

Raccoon Fall Postcard


This is a raccoon that I made in Adobe Illustrator this past week. This project gave me some trouble and I really had to problem solve to get it to look good and correct. My vision for this postcard was to make the raccoon the center of attention and really get the message of the holidays across to the audience. I am glad that I added my own personal handwritten typeface for the 'happy holidays', I feel it adds a little of myself into this project. I am really happy with my finished project and I feel it looks exactly like I wanted it to. 

This project was also my first project that I shared on Behance. I am glad that I was introduced to bechance because it is a great place to showcase all of my hard work other than my blog. I spent a lot of time on uploading it on Behance, I took the time to make it look professional because I knew many professionals would be looking at it. 

Overall I am very happy with this project.

Monday, October 3, 2016

How to Organize Clips in Premier Pro

Premier Pro is a necessity for any videographer: young and old, but sometimes it can be a a bit confusing to manage and organize your files. There is an easy way to do this; by using bins! Bins are found in the project panel and can contain source files, sequences, small clips, and other bins. So lets get started on the tutorial on how to organize your clips using bins.


First open your project panel (it should already be open when you open premier pro) and have your clips ready to be organized.

Now click on this button at the bottom of the project panel that looks like a file folder to make a new bin.

Now your new bin should look something like this
Now you can rename it to anything you want.


If you double click on the Bin you get the bin's properties where you can view the contents and change anything

I hope you enjoyed this tutorial and it made your time on Premier Pro much easier. Happy Editing!

Thursday, September 22, 2016

1 in 2000 interview


Today I interviewed Emily Mauk about one of her most memorable summer experiences. She talked about how she counseled at a camp for middle schoolers. She told me about how she went canoeing with her campers down a long river and then all of a sudden there was rapid water and logs sticking up out of the water. She explained how she feared for her safety and the campers that she was leading. At the end she told me that she stood up to push the log away but ended up cutting her leg. But in the end, Emily explained that everyone was okay and went back to having fun.

To make this video I had to use two voiceovers using the app Voice Memos. I maintained a professional voice in these voiceovers and tried to be clear and precise. It wasn't my first voiceover but it was my first one in a while and I had forgotten a little on how to import it so i asked some fellow classmates to assist me and it all ended good.

Shooting this video was fun, but challenging. Usually filming an interview video you use a medium shot the whole time but Mrs.Smith wanted us to add some more pizzaz to it so we tried to incorporate other shots. I like starting with extra wide shots and then just adding in some more varieties of shots.

I am really happy with my finished video. I spent a lot of hard work and time on it to make it just right. I personally really like my ending, where I added the final voiceover. Emily and I laughed a lot while making this video so I wanted to show the viewers all the fun we had by incorporating some shots of Emily laughing. I sort of treated it like a 'bloopers' reel. The one thing I wish I could fix was to make it a tad bit shorter. The video started off at two minutes and ten seconds and I cut it down to one minute and fifty seconds. I would've liked to shorten it up more, but I felt I couldn't because I wanted Emily's full story to be featured in this video so I kept it at that length.

Overall I am very happy with the video and am glad it looks as great as it does.

Monday, September 12, 2016

Photoshop Reflection

Branding- Product
Basic Photo Editing- Building A Portrait Collage

Basic Photo Editing- Clone Stamp and Patch Tool


Basic Photo Editing- Spot Healing Brush

Basic Photo Editing- Patch Tool

Labor Day Photo Shop Project

Basic Photo Editing- Content Aware Fill

Basic Photo Editing- Content Aware Fill

Basic Photo Editing- Clone Stamp and Healing Brush

Branding- Billboard


Throughout all of these photoshop tutorials, 
I learned everything from technical skills to people skills. Each project taught me something different and made me work to get the finished project. I learned project management and how to finish the project in the time given. 

Three key tools that I couldn't live without during thesis projects are the clone stamp tool, quick select tool, and the transform tool. The clone stamp tool was a necessity because if i ever made a mistake or there was some type of flaw on the photo and i needed a quick way to get rid of it I would open up the clone stamp tool and stamp away! The quick select tool was really useful during my last project- the man with the forest and rocks on him. I didn't want to take a lot of time selecting the area that i needed so I turned to the quick select tool and just clicked and dragged over the area I wanted selected and it did the trick! And finally the Transform tool was useful because almost ever picture on photoshop will need to be resized in some way or another and the transform tool allows me to resize any photo that i want before actually editing. 

My favorite skill was the clone stamp tool because it was fun to see how a little tool can make such a drastic difference. It will be valuable in the future because i can correct my mistakes. 

My strengths were time management and technical skills on photoshop and my weaknesses was working in a quiet environment because for me, a loud environment lets my creativity run wild.

Next time what I would do different is struggle a little on photoshop and try to figure it out by myself before I ask the teacher. Something I would keep the same would be my time management skills were pretty good during this assignment. 

This project overall was a great learning experience. 


Friday, September 9, 2016

ONW Procedures Reflection Blog


The assignment for this project was to make a video about showing good behavior at Olathe Northwest High. This video shows how to help a friend open their locker. I added a touch of humor to make this more entertaining to watch.

I first started out with the pre-production stage where I came up with the idea and storyboarded. This stage is a necessity because it helps you sort out through all of your ideas. Then I went to the actual production stage where I filmed with my two other partners and followed my storyboard. And finally I went to the post-production stage where I edited my footage using Premier Pro. This stage is my favorite because it really starts looking like a professional video.

Throughout this process I learned many things; technically and professionally. This was my first project using Premier Pro so I learned many things on that program such as shortcuts and professional editing skills. I also learned new aspects of teamwork while working on this project. I learned how to work well under certain circumstances.

I think next time I will time manage my week better to make sure that I will have enough time to succeed. Something I will do the same for the next project is working with people i know i work well with. My team for this project was amazing in helping me and filming our videos and acting.

Overall iI think this was a positive project to start the year with and I will use what I have learned from this project in later project throughout my next three years at Olathe Northwest and also in my later career.

Below are four screenshots from my video that roughly show the beginning, middle, and end of my How To Open A Locker video.